

Showing posts with label peanut butter. Show all posts
Showing posts with label peanut butter. Show all posts
Sunday, August 25, 2013
Chunky Monkey Muddy Buddies

Thursday, July 25, 2013

Sunday, July 21, 2013
Peanut Butter Toffee Apples

I have braces. And, I totally completely want them to go die in a fire or something sort of hate them.
I mean, they don't exactly do wonders for my appearance.
Monday, April 1, 2013
Monster Cookie Granola

It's kind of boring.
This post is basically a reminder about my blog again. You know, photos.
I was going to do it by itself, but really, who wants to read that?
Anyways, just to remind you . . .
I love blogging. I love being a dessert blogger. It's the best job ever. It's like having a job, without having to have a job. Plus, there are now employment policies saying you have to be a certain age.
Bloggers make something, take pictures, and then show others how to do it.
I don't have a camera.
Pictures are one of THE most important parts of blogging. Without a picture, you have nothing.
I don't have a picture, but I still want to blog. I started out by just posting others photos. Now I take others photos and edit them to make them part mine, part theirs. I still give proper credit.
I try to use pictures of what resembles my food. This can sometimes be a challenge (who else puts Swedish fish and Robin Eggs in magic bars?) But, I manage to keep up with it.
I mean, I don't put a picture of a pie when I'm doing some bark.
The recipes I post are real. Let me repeat that, THE RECIPES I POST ARE REAL!!
This means you can make them and they will be totally delicious. Because I post real recipes. I don't just say "Oh hey, I bet some banana pudding mix combined with 2 eggs and 1/4 c of brown sugar would taste wonderful!" Because, it probably wouldn't.
THE RECIPES I POST ARE REAL because I have made things similar to them, or I base them off of things I have seen.
I have made puffy cake bars just by being tired of waiting for the oven. They turned out great. I knew if I used a red velvet cake mix it would turn out just as good.
I've seen people doing meringues with Duncan Hines cotton candy starters, so I knew it would work with fruit punch.
Basically, what I'm saying is, you can make my recipes and they will be delicious.
I always try to give proper photo credit. If I mess up and it's actually you're photo and not the one I'm cited, just know that I am so so sorry! It's an honest mistake if it ever happens, and if it does, please leave a comment and let me know.
Another reason I posted this reminder with a recipe is because, really, you need this in your life. You cannot even wait one day because it is that good.
Monster Cookie Granola
A granola flavored with peanut butter with M&Ms throughout.
Serves:12 Prep Time: 10 min Bake Time:8 min Total Time: 20 min
Ingredients:
- 1/2 cup peanut butter
- 1/2 cup honey
- 2 cups old fashioned oats
- 1 tsp vanilla extract
- 1/2 cup of M&Ms
Notes: This granola isn't crunchy, it's chewy. I don't like super crunchy granola (because it hurts my braces), but I LOVE chewy. If you like yours really crunchy bake an extra 5 minutes.
As usual, Picmonkey is angry and throwing a little fit. So, my photos are not the best quality.
Also if you look at the photo closely . . .
You will see honey grahams, popcorn, and pretzels. These are not granola things. Because no one puts m&ms in their granola. So it's hard to find a picture that looks like that. So, just know, if you make this granola, it's not going to look like this!
Photo Credit: Taste of Home
Saturday, March 16, 2013
Do Si Dos Cookie Pizza


You see, buses come in two different shapes.
They come in the shape with a little "nose" sticking out.


The ones that have the little nose have that because the engine is located in that little nose. The ones that don't have a nose have the engine sitting right next to the driver on a little platform. Just keep that in mind.
Last year we had the second kind of bus. Keep that in mind as well.
One time when we were driving to school (it's reeeeaaaly far away. Like, we have to get on the freeway because it's so far. So far that the bus comes at 8:10 and we get to school at 8:35) there was this weird smell.
I immediately pointed it out to my friend, who said she couldn't smell anything. It was a really weird smell, kind of sickly sweet, like caramel/maple syrup and gas/motor oil.
Then a weird beeping noise started. Some kids were joking that there was a bomb and the bus would blow up. (what's super funny is that that actually happened. sort of)
Then the smell got a lot stronger. A LOT stronger. So strong that my friend could smell it. Everyone was commenting on it. Something was definitely going on with the bus.
We pulled into Artic Circle, and the bus driver stood up and grabbed a weird little handle on the platform thingy. She pulled it up and there was a HUGE hissing noise and smoke and gross caramel motor oil smell. None of us had known about the nose engine bus thingy, so this was a big surprise. She had to call another bus and we had to evacuate and go on some other bus where the bus driver was completely dressed in yellow.
And so we were late to school and everyone told all the other kids that the bus blew up, but no one believed us.
I don't know what this has to do with do si dos pizza at all, but I know that this pizza totally rocks.
Do-Si-Dos Cookie Pizza
A peanut butter oatmeal cookie base with lots of do si dos layered on top, then drizzled with fudge sauce.
Ingredients:
- 1/2 cup chunky peanut butter
- 1/2 cup packed brown sugar
- 1 egg
- 1-1/4 cups quick-cooking oats
- 1/2 teaspoon baking soda
- 1/2 box of Do-Si-Dos
- fudge sauce

So, I had no idea what do-si-dos were. I used to think they were a spin off of Cinna-Spins, but actually they have nothing to do with that at all! They're peanut butter oatmeal cookies.
I totally love cookie pizza, and as soon as they said peanut butter oatmeal cookies, I knew what this was going to be. I made a peanut butter oatmeal base, and then pressed Do-Si-Dos on top, and then, to make it even yummier, I added a fudge drizzle.
Cuz' everything tastes better with chocolate.
These photos are edited by me, but originally came from The Friday Friends.
Tuesday, March 12, 2013
Tagalong S'mores

I'm doing this thing in choir called a Solo Ensemble Festival. It's where you choose a folk song to learn, either a solo or in a small ensemble, and perform it in front of some judges.
It's really scary to do. Because, there's like, real judges from the college coming. You actually have to perform your song three times, once in front of the choir, once in front of all the parents, and once in front of the judges.
I haven't done it in front of the judges yet, but today I did my song in front of all the parents.
Oh. My. Goshness. You like, die of fright. I can sing perfectly (well, almost perfect) at home, but when I go up there . . .
You stand. Your mouth is dry. You swallow, but that only makes it worse. You're sweating like a sponge. You feel all the hundreds of eyes on you. Watching you. The pianist starts playing then pauses. Waiting. For something. Oh yeah, she's waiting for you. You open your mouth and a high pitched whinny comes out. You smile huge ( supposedly the smile distracts from the mistake). Your knees are shaking and your voice comes out wobbly. You forget to breath after the word "ceasing" and nearly pass out while holding out the word "love". You keep on singing though. Because what's worse than messing up is not singing at all. Like the girl before you did. So you keep on singing. Your voice suddenly catches in your throat and you smile bigger than the sun. It's a forced smile though, and the audience can tell. You keep on singing, messing up and smiling, until finally, it's over. Finally over. It's very quiet. Still. And then the applause starts. They liked it? They liked that shaky high pitched noise coming out of you? You bow deeply, and walk back to your seat. You finally can relax. For the rest of the evening, people say congratulations and how you did great. And you say thank you and tell them they were good too even thought you have no idea who they are.
That's what you do. And that's how it is.
I always do better at home than I do at performances just because of how nervous I am. But I know that I don't sing horrible, I actually sing okay. I listened to myself on the recording on my dad's phone, and I sound better than okay.
So much better than okay that a lady in the church choir comes up and tells me that she wants me to sing that song in church next week.
And then I start going into panic mode again.
So, what do you do when you have just been told that not only will you have to sing in front of judges, you will also have to sing in front of your whole congregation? Well you go home and make tagalong s'mores.
They're as good as they sound.
Just do it. (like Nike)
Tagalong S'mores
Tagalong girl scout cookies with a marshmallow in between them. The shortbread in the tagalong is the graham cracker replacement, and the chocolate coating takes place of the hersheys. And then there's the marshmallow too of course.
Ingredients:
- Tagalongs (however many s'mores you're going to make x 2)
- marshamallows (1/2 as many marshmallows as tagalongs)
I discovered making s'mores in the oven a long time ago and still do it alot (except now I kind of like roasting them over the stove more). These are just tagalongs and marshmallows. I know that doesn't really qualify to most people as a s'more, but the chocolate coating = chocolate. The shortbread part= graham cracker. And then the marshmallow is just the marshmallow.
These are definitely some of my favorite s'mores. As in best s'mores I've ever eaten. I love them soooooo much! I love peanut butter chocolate reeses s'mores, and this girl scout version is even better!
Photo Credit: Edited by me, original photo from The Seaside Baker
Tuesday, January 22, 2013
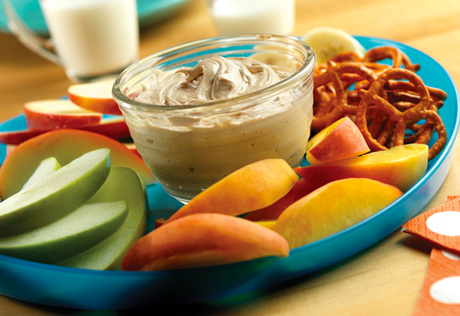
2 Ingredient Fluffernutter Dip
Who remembers what a flow chart is? I don't! I'm not sure if we learned it in school.
The reason I bring this up, is because I am going to reinvent the flow chart. Whatever it is.
We will start with one topic and bounce to another.
Here we go!
Chocolate =
Peanut butter= and Mint. and fruits ( strawberry, cherry, raspberry, orange)
Fluffernutter=
Marshmallow=
Smore
So we've branched off from chocolate to peanutbutter to fluffernutter to marshmallows to smores.
Chocolate also equals mint and fruits, but let's forget that and make a different flow chart.
Magical-ness like unicorns and glitter=
Rainbows=
Sprinkles=
Cake Batter=
Vanilla=
Cookie Dough
I think I prefer the second flow chart. But this shows how my love of rainbows and cookie dough and cake batter all correspond with one another.
But let's go back to the first one. Chocolate and Fluffernutter and such. I love the combo of fluffernutter. Peanut butter and marshmallows. Aaah, bliss.
This is another one of my gym ideas. I had fluffernutter on the brain that day. More fluffernutter to come.
But this recipe couldn't be easier. The title basically tells you what's in it. Peanut Butter and Marshmallow Fluff. It's crazy good, and super simple. You can bet it's gonna show itself alot more at my house!
FlufferNutter Dip
A perfect complement to fresh fruit and a tasty alternative to traditional dips. This is a snack that the kids will love!
Ingredients:
- 1/2 cup marshmallow creme
- 1/4 cup creamy peanut butter
- 2 teaspoons water ( I added this after I posted the recipe. It makes it a lot less sticky and easier to dip.)
Pictures are from Campbell's Kitchen
Subscribe to:
Posts (Atom)
