Thursday, February 28, 2013

Samoas Magic Bars


I'm in a blogging funk. Every thing I come up with has already been thought of.

Like I just started writing the post for Samoas Smores, and then I see Ashton's blog Sigh.
#Samoas Inspired #Ghirardelli S'mores from www.somethingswan... | Simple and gourmet all in one perfect classic #smore .
And then I thought, that's okay, I can post rainbow smores! And then I google it. And it's already been done.


So then I think Okay, minor setback, but that's still okay because I can make an oatmeal cookie shake!
 I think you know where this is headed. Has already been done

So, then I finally decide, you know what, I'm gonna make samoa magic bars NO MATTER WHAT. And I will not google it.

Samoas Magic Bars
A new girl scout twist on the ever popular magic bar. With a chocolate or coconut base, it just gets better with every layer adding chocolate chips, coconut, caramel bits, actual samoa cookies and sweetened condensed milk to top off the whole thing.

Ingredients:
  • 1 box coconut cake mix (or chocolate if that's all you can find)
  • 1 egg
  • 1/2 c butter (1 stick)
  • 1 cup chocolate chips
  • 1 cup shredded coconut
  • 1 cup caramel bits
  • 1 cup samoa cookies  (I roughly chopped mine, but you can skip it if you're crunched on time)
  • 1 can sweetened condensed milk
Directions: Preheat oven to 350. Spray 9x13 pan with grease. Combine cake mix, egg and butter until it reaches a dough consistency. Press into the pan. Spread/sprinkle the chocolate chips. Do the same with the shredded coconut. Place the caramel bits on top. Then add the samoas. Pour a can of sweetened condensed milk on, and then bake.

I know this recipe calls for samoas. Apparently girl scouts have vanished off the face of the earth where I live because I could not find them ANYWHERE. Luckily the WalMart people made something pretty close. They call it caramel coconut and fudge cookies.


These photos are edited by me, but were originally taken from The Kitchn

Tuesday, February 26, 2013

Chocolate Chip Cookie Butter


So.


Cookie Butter.

It's a thing. A pretty big thing.

I've never had Biscoff. But I want to. Really want to. Like, REALLY want to.

Because in my mind I'm imagining peanut butter texture that tastes like chocolate chip cookies.

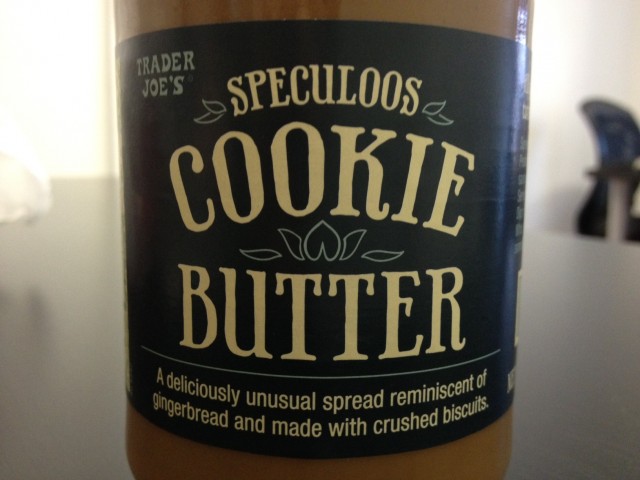
But when looking a little closer at the label, you see this

A deliciously unusual spread reminiscent of gingerbread and made with crushed biscuits.

So instead of tasting like chocolate chip cookies, it tastes like gingerbread and biscuits.

What's better biscuits or chocolate chip cookies? I think the answer is obvious.

So, now I'm kind of over biscoff. I mean, I haven't really tried it, buuuuut.

So, anyways, I took matters into my own hands. I had to do what biscoff wouldn't. I had to make . . . . Chocolate Chip Cookie Dough Cookie Butter!

OMGosh it is so good! Just imagine biscoff only tasting like cookie dough. After I made it, I was kind of at a loss for what to do. I mean, do I put it on a sandwich or what?

You put it on marshmallows. Or animal crackers. Or anything you want! Just make it!

Chocolate Chip Cookie Dough Cookie Butter 
Cookie butter made from crushed up chocolate chip cookies, producing a biscoff like texture that is totally delicious
Serving: Makes 2 cups 
Ingredients:
  • 2 1/2 cups crushed chocolate chip cookies from this recipe (20-25 cookies)
  • 4 tablespoons canola or vegetable oil 
  • 1/2 cup heavy cream
  • 1/3 cup chocolate chips (I used mini ones)
Directions: Crush the cookies from this recipe in a food processor until they are crumbs. Slowly drizzle in all of the oil and heavy cream with the processor turned on. Stop the processor and test the thickness of the spread. If you'd like it thinner, add more heavy cream, one tablespoon at a time until it gets to the consistency you prefer. Store in the refrigerator.
This recipe is adapted from all over the internet, but the directions are adapted from Buns in my Oven

So. The pictures. PicMonkey has not been working with me lately. It makes all the pictures blurry. Like in the butter pecan bars that I made.  See?


And here's today's

See? Super blurry. So, I apologize, it's just not working. I'm trying to figure it out, hopefully your pictures will be nice tomorrow!

Oh and just in case you couldn't notice from all the links, this is part 2 to the cookies from yesterday.

The photos I used are from when SnapGuide.com. They made a cookie pizza (a "classic" delicious dessert pizza) and this is when they were spreading the dough in the pan. I edited of course, and posted my own recipe, but you should still go check it out!

Monday, February 25, 2013

Chocolate-less Chip Cookies Part 1

 
These cookies aren't very good.

They're flat, and too crispy and not soft enough.

So you wonder why I would post these.

It's because I need them for a recipe I'm doing tomorrow. And I don't want to have to write in that recipe instructions to bake these cookies.

You probably think, Ok, that makes sense, but why not just post a good cookie recipe and use that?

Because for the recipe I'm doing, I need crispy cookies. Crunchy cookies. And that is these cookies only strong point. And it's not even very strong, because they're not just crispy on the outside, they're crispy on the inside too. Not soft enough.

So, don't make these if  you want some rocking cookies. Make them if you want the something awesome I'm posting tomorrow.

Toll House Cookies Part 1
These cookies are crispy, but have no chocolate chips. Make them for crushing up in milkshakes and other stuff like that.
Ingredients:  
  • 1/2 c margarine
  • 1/3 c sugar
  • 1/3 c brown sugar
  • 1 t vanilla
  • 1 egg 
  • 1 1/8 c flour 
  • 1/2 t baking soda
  • 1/2 t salt
Directions: Cream margarine and sugars. Add eggs and vanilla;beat. Add dry ingredients and stir until blended. Drop by teaspoons onto greased sheet. Bake 10-12 min at 375.

The last time I made these was a while ago; I just don't make them because they're not good! Unless you like super crispy cookies.

See, I even blogged about it! The recipe made a TON of cookies (102 to be exact), and I scaled it down a lot this for this recipe . (BTW, in the post I say I got the recipe from my aunt. Not true, her recipe is awesome, this one isn't.)

Yep, there's me when I was 10.  (I still have that hat, but I don't wear it because it got a fry sauce stain on it, otherwise I'd proudly be sporting it at every sports related event ever (Go Cougs!) (How many parentheses do you think I'm going to use in this post?))

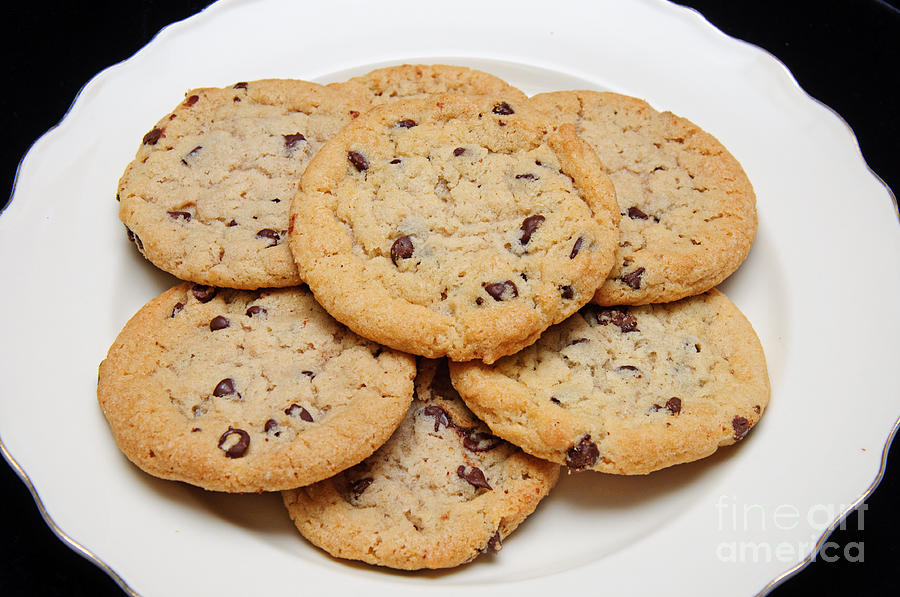
Photo Credit: Fine Art America

Friday, February 22, 2013

Friday Recap #8

It's Friday! It's Friday! It's Fu-Fu-Fu-Fu-Riday!

I had a little fun, but also LOTS of bad stuff  some experiences this week.

Involving my hair.

1. 2 REALLY bad accidents that I'll talk about on Monday. But I'll just tell you . . .
Accident #1 My hair accident involved a Kitchen Aid
Accident #2 My hair accident involved fire

Very very bad damaged hair.

Obviously, I kind of value my hair alot. Not trying to sound vain, but it's really pretty. My best physical quality is my hair (and it's not limited to just my head. I have bushy eyebrows and long eyelashes and hairy arms) And my hair is thick (thanks Dad!) and really long. REALLY long.
https://blogger.googleusercontent.com/img/b/R29vZ2xl/AVvXsEhQ1O9alDyBwE3CdG0aaER9c92sZPChS2BlRtvQ4RS2dZZDqGP56OYXLdxvtMlPac2TB_-Or1-jl2SRLVDITZbGdVRrzGYPJXghHekXzXD48ffN2dANYHXe67dx7ciLiWPKpbuwrutzYKlU/s1600/Neal+Fam+(23).jpgThe hair goes past the photo.

https://blogger.googleusercontent.com/img/b/R29vZ2xl/AVvXsEg_kxPp812X94R7rrLLkGav68kUocrtKg-4m1JWBIiQOuWVXIfS2rIaHCiYMQuHIhIWWtzaKJ7WRGfP8h0_jfY51dz8k6M2BAbRryDiYsUbGdm3Vs9B-uWb7wivYBI3uLnOxiEp7ss9WQy2/s1600/DSCF7118.JPGSee it flipping out?

 It's going past my patootie.

So, yeah, I have long hair. That weirdos touch in the hall.

So I am very sad that I had accidents with it.

Anyways, enough talking about hair. Let's get onto the food!

2. Made some of the best bars ever (crazy good and super easy!) with the best buttercream ever. Which is saying a lot. Because I've made conversation heart buttercream.


3. Decided to see what all the hype was about with gooey butter cake. And now I'm addicted just like the rest of the world.


4. Redid my magic cake batter bars, to make an easier version. Still just as delicious, I promise!
DSC_0199

5. Conquered 2 of my finals! (English and Literature) 2 down, 2 to go!

6. Since it's the end of the trimester, there are finals and all that. And new schedules. My schedule has never changed. Ever. But now it's having some major changes. I used to have pre algebra (honors), choir, literature (also honors), science, gym, English, yearbook. Now I have Pre Algebra (still honors. Not really sure if this is good or bad), English with a new teacher (and now also I have a class with my bestie!), literature (honors), health (glad to get a break from gym, but everyone says it's worse. We get to learn about the miracle of teenage growth, and anarexic people. which sounds just as bad), choir, yearbook.

So, now my yearbook isn't across from my 6th hour. So I can't get there super fast. I still have to walk up actual stairs. sigh.

7. Went to my little siblings Science Fair. There's no winners or losers because they don't want to hurt anyone's feelings (I kind of think this is dumb. If we shelter you all your life, you're going to go our and be totally surprised to find that there is a lot of competition in this world, and you are not going to win everything. ) They do this same thing at little kid soccer games. They don't keep score, so no one wins or loses, but really all the parents are keeping score in their head. So lots of parents will jump up because their kid just scored a "winning" goal. When there are no winners. So then some people will get confused.

Anyways, the science fair. They entered with a solar oven. You use this card board covered tinfoil to collect the suns rays, which goes down into a little black jar where you put the food (really, the only thing you could put in there is smores). The food heats up and so, uh, yeah.
Windshield shade

8. So I had a pretty normal week. Besides finals. Did anything happen in yours? (did you kill your hair and eat gooey butter cake? Huh? Beat that!)

Wednesday, February 20, 2013

Cake Batter Magic Bars

 DSC_0199
I know I just posted some cake batter seven layer bars not too long ago, but they were kind of hard.

Hard enough that I wouldn't make them again. Don't get me wrong, they were awesome! I just can't really handle recipes like that because I don't have enough time.

Because I'm really busy.

Really busy doing stuff like

eating cake batter oreos
doing math homework
being awesome
texting
braces stuff
school junk
editing photos
computer
washing dishes
eating puff bars
dreaming of twinkies
playing with my sisters
looking at very cute kids
 Joshua(by the way, he's starting to walk, and now has 7teeth)
playing with said kid
climbing on the roof of our shed (so fun! you can see all over the neighborhood, and it's warm(ish) and no one can bother you, and you can eat cookies in peace)
sneaking treats
drinking milk (I really don't drink enough and have been trying to have more lately)
and just tons of other things.

I'm sure you are busy too so I redid it magic bar style.

Now, just to make myself sound impressive (not as easy as it sounds.) I'll tell you all the layers that went into this.
1st layer is a the crust (not really a crust at all, it's almost the whole bar) that is just cake mix, an egg and butter.

2nd layer is cupcake bites from the dollar store. They are sooooo good!

3rd layer is golden oreos. They have a pretty good funfetti taste I've discovered (just like Sally!)

4th layer is actual funfetti cake. Because you can't have cake batter magic bars without cake. I'm pretty sure it's a rule.

5th layer  is sprinkles. Duh. You cannot have cake batter without sprinkles.

6th layer  is sweetened condensed milk.

So these all turn into magical stuff. Almost as magical as unicorn poop.

But, to be fair, how can you compete with magical poop?

Cake Batter Magic Bars
Delicious magic bars flavored funfetti. The first layer is a cookie base, then a cupcake bite candies, golden oreos, actual cake batter, sprinkles and the traditional sweetened condensed milk to seal it all in to a delicious cake batter magic bar
Ingredients:
  • 1 box funfetti cake mix
  • 1 egg
  • 1 stick of butter
  • 2/3 cup golden oreos, roughly chopped
  • 4 tablespoons sprinkles
  • 1 can sweetened condensed milk
  • 2 boxes cupcake bites
  • 1 box funfetti cake mix with ingredients called for on box
  • 3 tablespoons sprinkles
Directions: Preheat oven to 350. Combine cake mix, egg, and butter in a bowl. Press into a greased pan. Press cupcake bites on top. Place golden oreos on top of that. Combine funfetti cake mix with ingredients on the box. Pour on top of the golden oreos. Sprinkle the sprinkles on the cake batter. Pour sweetened condensed milk on top of that. Bake for 16-20 min.

So did you know there's unicorn poop soap?


Yep, there is.

There's a person who makes tons of poop soap. Look at all these! They come with scents. (the unicorn poop had a cotton candy scent)

Oh, just one more unicorn poop soap. Pink Unicorn Poop Soap. Smells like bubblegum!


On with the poop!


Zombie Poop with a fresh dirt scent


Alien Poop. No scent, but it glows in the dark!


Robot Poop with a motor oil scent.


Anyways, don't leave thinking of robot poop. Think of magical stuff like unicorn poop and Cake Batter Magic Bars. Bars that you should go make right now.


Photo Credit: Domestic Rebel

Tuesday, February 19, 2013

Gooey Butter Cake


So, everyone has their favorite recipes. Like their favorite chocolate chip recipe, or their favorite banana bread recipe or something like that

So, even though gooey butter cakes are nothing new, I'm just posting my favorite one. 

I remember when I first learned about gooey butter cakes. The post I read talked about them in such glowing descriptions, I knew I had to make some. I just put the ingredients I needed on the fridge, and my mom actually went to the store and bought them! This doesn't happen often, and I was so happy I made a gooey butter cake immediately

It was sooo good. Love at first sight. Or, taste I guess. 

Either way, give this a try, especially if you've never had gooey butter cake before. Trust me, it's worth it. 

Gooey Butter Cake
A dense rich gooey butter cake. It could easily be your new favorite cake!
Ingredients:
  • 1/2 c. butter
  • 1 box yellow cake mix
  • 1 egg
  • 1 (8 oz.) pkg. cream cheese, softened
  • 2 eggs
  • 1 lb. box confectioners' sugar
  • 1 tsp. vanilla
Directions:  Mix together cake mix with butter and 1 egg. Pat into an ungreased 9 x 13 inch cake pan. Cream together cream cheese, 2 eggs, powdered sugar and vanilla. Pour over cake mixture, spreading to the edges. Bake at 350 degrees for 35 minutes.
 
 I was really hesitant to make this. I knew it would be good, but it looked hard. Because it has lots of layers and stuff. So I found the easiest possible recipe off Cooks.com. And it was easy.

Mostly.

I just had to wash dishes in between.

When I first ate some, it was really soft. So I figured it needed to cool off. I stuck it in the freezer (did I mention I have zero patience level?) and ate dinner. It wasn't as soft, but it was still pretty soft. So I thought maybe I didn't cook it enough. All the pictures I'd seen didn't look like this. So then I tasted it again and it was STILL soft. And then I realized that's how it was supposed to be.

I was expecting an almost fudgy brownie consistency. Nope. Guys, these really ARE gooey. And buttery. So they will be soft.

These were super good. They were rich though, so don't eat the whole pan. Not that I have that problem. My whole family was jumping on it because it was so good.

These photos came from Sweet Pea's Kitchen. Aren't they gorgeous? Mine weren't very, um, photogenic. For one thing, I made them in the evening when it was kind of dark. Bad lighting. And mine looked really, pale. Really really pale. But that doesn't really matter. They were still really good!


Monday, February 18, 2013

Butter Pecan Gooey Bars with Eggnog Rum Buttercream


So, I'm a Mormon. You can kind of tell by my side-bar.

Anyways, in our church, there's lots of different sections for kids. For the girls 8-12, they have Achievement Days. You do lots of fun activities once a week and try to strengthen your faith and all that.

For one of the activities we did a bake-off. We'd make something at our house, and then we brought it to the church and tasted all the food and judged it.

Obviously, I'm a baker. I was a baker even back then. This happened just last year. I had to win this thing. I had to! I was just going to make cake mix cookies, but I overheard one of the other girls saying she was going to do that. I'd obviously have to make mine cooler. I looked downstairs in our basement, and saw butter pecan cake mix.

Lightbulb. (tell me, you just said that in your best Gru voice right?)

So I was going to make butter pecan cookies. But I still needed to make them cooler. I looked on the back of the box. It said something about rum frosting. Bang! Now we're making butter pecan cookies with rum frosting.

I started to make it super fast style, running back and forth from the fridge to the Kitchen-Aid. In the confusion, I accidentally grabbed margarine instead. Margarine has a lot more moisture than butter. They used to be almost the same, but they've been adding more water ever since. So, my cookie dough was really, well, not sticking together. To moist. So, I made it into bars instead.

OMGosh. Best. Decision. Ever. Made. It was so good! And then I put rum frosting on top . . . Swoon.

Of course, I won the bake off thingy.

Even though it was a year ago, I still remember how good they were. So for almost a month now, I've been asking my mom for butter pecan cake mix. She finally got some, and I made these bars lickety split last Sunday.

Then I started recreating the frosting.

I could smell it. Oh yeah. It smelled kind of like egg nog. So I added some nutmeg to it. And then a teeny tiny little dot of yellow food coloring. Then it was the color of egg nog.

So, needless to say, the whole family basically inhaled these. I mean, gooey butter pecan cake mix bars with eggnog rum buttercream, of course everyone loved it! It's not possible to not like heaven.

Butter Pecan Bars with Eggnog Rum Buttercream
Butter pecan gooey cake mix bars that are topped with a delicious buttercream made with nutmeg and rum extract.
Butter Pecan Bars Ingredients:
  • 1 box butter pecan cake mix
  • 1 stick margarine, softened
  • 1 tablespoon cornstarch
  • 2 eggs
Directions: Preheat oven to 350. Mix ingredients in a bowl. Press into a greased 9x13 pan. Bake for 12 minutes (that's an estimate, you might want to check a few minutes earlier, or bake it a little longer). Once cooled, frost with buttercream, and serve.

Eggnog Rum Buttercream Ingredients:
  • 2 tablespoons butter
  • 2 cups powdered sugar (divided into 1 cup and 1 cup)
  • 4 tablespoons milk
  • 2 tsp nutmeg
  • 3 tsp rum extract
  • *optional* 1 really small drop of yellow food coloring
Directions: Cream butter alone. Add 1 cup of the powdered sugar and add milk. Gradually add the other cup until you reach desired consistency. Add nutmeg, rum extract and food coloring. Frost the bars once they are cooled. Serve.

When I made this, the buttercream was twice the ingredients I posted. It made way too much. We used the rest for graham crackers and it was great. But, when I posted this I cut it down in half so there shouldn't be any extras.

Photo Credit: My Recipes

Saturday, February 16, 2013

Friday Recap (Valentines Week)

Hey, hey, it's time for Friday Recap. Where I recap on Friday!

Yeah, I know, not very funny. Sigh.

My finals are getting closer. And closer. Close enough that teachers are handing out study guides. Not a good sign.

Anyways, here's what I did this week.

1. It was Valentines Day. We got heart attacked.
Heart Attack Printable 2
And then we ate the cookies that came with the heart attack, and then heart attacked our neighbors with snickerdoodles.

2. I made some red velvet marshmallows. Combine it with Amanda's red velvet graham crackers, and we're destined for the best smores EVER.


3. Then I made some really good frosting. The only non-red-velvet recipe all week.


4. Next I made you some candy! Red velvet of course.


5. Then I got a little busy, and had to do something easy. Something SUPER easy! Red Velvet Puffy Cake Bars!


6. And then I made some red velvet cannolis. They are so good I must be a genius.


7. There was a Valentines day dance at my school. It wasn't as cool as last year, but it was still fun.

8. I had a choir concert. We had to wear all black. ALL black. It was really hard to find everything black to wear. So I had lots of layers when I was done.
1st layer = underwear
2ndlayer= black leggings
3rd layer= white and black dress. black bottom skirt and white frilly top
4th layer= black tank top
5th layer= black sweater/shrug
6th layer= purple scarf they gave us to put on top of our all black clothes
7th layer= black high heels
After the concert was over, we went to Artic Circle. The one close to us is kind of, slow to update. So they still have egg nog shakes in February. But I don't have anything against that! They were so good! My two fav flavors from them are egg nog and grasshopper (mint oreo)


9. I had to do a book report in English. It was really hard and I didn't like it.

So if you condensed my week down, it consisted of red velvet, choir and egg nog, and school stuff. Which isn't all that bad.

So, how was your week? (I bet it didn't have any egg nog!)

Red Velvet Cannolis

DISCLAIMER: This is actually my idea, no one elses, but my camera's broken (waaah!) and I still wanted to have a picture for the post. I used a bunch of photos from a few other sites, partly because these are sites that I read and love, and their photos are beautiful! They are from Real Mom Kitchen, and Tidy Mom. Go check them out, they're amazing bloggers! I did this because I wanted pictures, but just know, these are not mine, I'm just sharing their photos and sites so that you can go see how cool they are, and this was a great opportunity for that. I edited the photos from Real Mom Kitchen, but they're technically still hers.

So my braces were tightened today.

You all know about the agony of braces from when I complained about it in this post. Basically what the orthodontist does is take off your old colorful things (the stuff that is the color of your braces.) These things


Then he takes off the wires. But he leaves the brackets on. Then he puts in smaller wires. Since the wires are smaller, they push more against your teeth. Which means they hurt more. Alot more.

Basically braces stink. Here's some stuff from an article I found that tells the side effects of tightening braces.


Headaches, nosebleeds or both can occur because of the pressure brace tightening builds up especially the day or two after a tightening.
When braces are tightened the excess metal is cut off and you will be asked to run your tongue over the metal to make sure it feels smooth. A big-portion of the time a tiny metal end will be missed digging its way into your cheek well after your visit to the office. If you smile it will cut deeper. Any soft spot inside the mouth is at risk. That's why the orthodontists give out wax. The wax is supposed to be put on top of the metal end, bothering you, to help prevent cutting or pain. Wax doesn't stay in place well and it gets swallowed a lot.

Um, yes, totally true. I have kancor (pronounced cain-ker) sores in the shape of wires that are in really deep. I've tried putting wax on before. Does. Not. Work. It is sooo hard to keep in place.

When you get your braces tightened, it won't hurt at first. Then after a couple of hours the pain kind of sets in. So as soon as my braces were tightened, I went and ate some Birthday Cake Oreos (sooooooo good!) Now I can't eat anything. Besides pudding, jello and ice cream.

When I first got my braces on, all I could think of was the pain. I kept asking my friend (who had braces) how long it was going to hurt. Eventually, I kind of got used to the hurting. It was weird. Then it gradually stopped. Then you have a week of normal-ness. And then you get them tightened again. And then it hurts again.

What really stinks is this time I have to have rubber bands on at night. So even if you kind of forget how much your teeth hurt, then you put your bands on. Oh, there's no forgettting here!

The only time you can forget your teeth troubles is when you eat something. When you eat something totally delish. When you eat Red Velvet Cannolis

Red Velvet Cannolis
Delicious cannolis flavored with red velvet cake mix
Ingredients:
12 cannoli shells
  • 4 cups ricotta cheese
  • 1 cup red velvet cake mix
  • 1 1/2 cups unsifted powdered sugar
  • 2 tsp vanilla
  • 1 tsp red food coloring (optional, but I like the little extra bust of color)
Directions: In large bowl, fold powdered sugar, cake mix, and vanilla into the ricotta cheese. Fill cannoli shells with filling. Sift powdered sugar over the top of the cannolis. Serve.

Adapted from Megan Munchies

I've never had cannolis until now. These are the PERFECT way to eat cannolis! They are so good!

Photo Credit: Real Mom Kitchen, Tidy Mom.

Red Velvet Puffy Cake Bars

DISCLAIMER: This is actually my idea, no one elses, but my camera's broken (waaah!) and I still wanted to have a picture for the post. This beautiful photo is from the lovely Teresa who blogs over at Can't Stay Out of the Kitchen (love the name!). She made some Red Velvet Gooey Butter Cake Bars, looks to die for yum! Go check out her blog!

 I've had a really hard time thinking of what to put in posts. You can kind of tell because now I'm resorting to talking about purple napkins and spicy cheetos.

 So, I'm gonna kind of just go with the flow and see where it leads me.

So, uh, did you know that today is National Almond Day? I used to think I was allergic to almonds. Because I ate some smoked almonds (sooo good! only thing better is sugared almonds) and then I got my cheeks red. Which reminds me . . .

My ward always has this really fun summer activity thing. It has a zipline, (that's my dad on that)
 
 the longest slip'n'slide EVER, (it is so fun to put as many people as possible on one little thing!)
 
 a super fun picnic, (there was a really yummy eclair dessert and pizza and tons of other stuff too)


a candy cannon. 

It's just really cool! Here's a picture of me when we went up there.
 
 Super model pose! NOT.

Anyways, we love going up there. In the summer of 2011 (saying that makes me feel kind of old) we invited my friend to come up with us. Of course, that's the year when there's no slip'n'slide. And there is no way we were going on the zip line.
And then it rained (I would have hated being one of the people who were camping there. That's what most of the people do, but our family is kind of crazy and doesn't.)

So we just went in the car and headed home. It was pretty fun driving home together. I have really sensitive skin. (like, SUPER sensitive. When I wear necklaces and it kind of brushes my neck I'll get all these little red marks all over my neck. Everyone will ask me if I'm okay and if I hurt my neck, and I won't have felt a thing and won't have any idea what they're talking about)

So, we had all been freezing from being in the rain in our swimsuits. So we turned the heat up a lot in the car. Pretty soon we were all warm and toasty. It was nice at first, but I was getting REALLY hot. I kept whining. And I felt like I was going to die of hotness (not THAT kind of hotness). So when someone had to stop for a bathroom break I jumped on out into the rain. I grabbed some wet grass and started smearing it all over my face.

Uh, oh. Not a good idea. My face was getting all red and puffy and I was even hotter!

So what do you do when you've got super sensitive skin? And a hot face (again, not THAT kind of hot). Well you'd make red velvet cookies of course! But being the wonderful busy person that you are, you don't have time for that. So instead you make some Red Velvet Puffy Cake Bars.

Red Velvet Puffy Bars
A delicious super easy dessert made in the microwave with a cakey, fluffy bar like consistency, flavored with red velvet!
Ingredients:
  • 1/2  box red velvet cake mix
  • 1/4 cup butter (half stick) softened
  • 1 egg
Directions: Combine ingredients in a bowl. Mix well. Spoon into balls on a microwave safe plate. Put them in the microwave for about ten seconds. Microwaves vary a lot, so make sure you look at them while they're going around. Once they start puffing up and there's not very much goo left on the top, that's when you take them out. Fast. Then cool and serve.

My whole family loved these! Well, actually more like me and my sister loved these. Either way, you have no excuse not to make these because they are sooo unbelievably easy!

These photos come from Can't Stay Out of the Kitchen. She made some red velvet gooey cake bars (which sound really good)

Tuesday, February 12, 2013

Red Velvet Peppermint Patties

DISCLAIMER: This is actually my idea, no one elses, but my camera's broken (waaah!) and I still wanted to have a picture for the post. This beautiful photo is from the lovely Katrina who blogs over at Warm Vanilla Sugar (love the name!). She made some Homemade Peppermint Patties, looks to die for yum! Go check out her blog! I edited her photos (turned them red) and added a headline thingy, but they're still hers. Go say Hi to Katrina for me!

I love the dollar store (it's technically called the dollar tree, but you know, same thing). I mean there is just SO. MUCH. STUFF.

I saw a pound cake there one time. A pound cake. In the checkout lane. They also have sour dough bread. And marshmallows. And they sell cotton candy there too! And they also sell
silly string
punch balloons
gumball machines
pregnancy tests
teeth whitener
laundry soap
soda
chips
coloring books
paperback books
solar dancing stuff (like daisies)
candles
perfume
glow sticks
sticky notes
pinwheels
bubbles
costumes
purple napkins
easter bunnies
spicy cheetos
toothbrushes
eye drops
coconut shampoo
tote bags
crazy socks
the best candy ever every in the world
chocolate chip
The best candy company in the world  is Candy ASAP. They make muddy bears (chocolate covered gummy bears), cotton candy swirls (I die), and cookie dough bites. The newest thing is cupcake bites!! And recently they've made red velvet cupcake bites!! (they're not available in my area :(     )

Cupcake Bites
So how do I get rid of my red velvet sorrows? Make a new red velvet candy of course! Enter Red Velvet Peppermint Patties.

Red Velvet Peppermint Patties 
A red velvet version of the popular mint candy
Ingredients:
  • 12 oz white chocolate candy coating or white chocolate chips
  • 1/4 cup dry red velvet cake mix
  • Red candy coloring (not regular food coloring!)
  • 1/8 cup butter (1/4 stick)
  • 1lb powdered sugar
Directions:
Combine Cream cheese and Butter in heavy bottom sauce pan. Stir over low heat till both are soft. Add Powdered sugar. Stir until well combined. Shape into small balls and flatten them down.  Put onto wax paper and let dry till set. While you are waiting for it to dry, melt the white chocolate candy coating or white chocolate chips in the microwave in 30-second increments, stirring after every 30 seconds to prevent overheating. Stir until the chocolate is smooth and completely free of lumps. Separate out about a quarter of the white chocolate into a small bowl, and set aside temporarily. Sift the red velvet cake mix on top of the large bowl of white chocolate. Add a few drops of red candy coloring, and stir everything together. Adjust the coloring and add a bit more if necessary, until you get a red shade that you like. Scrape the red candy out onto the baking sheet and put it on top of the cream cheese candies.
So, I wanted the inside of this to be flavored red velvet but that didn't really work. The inside is cream cheese, and the outside is red velvety. I still wanted the red velvet flavor to be extra strong, so I rolled the candies thin and coated them heavily. Either way, this is super delicious and perfect for Valentine's day.


Photo Credit: Warm Vanilla Sugar (which means I edited her photos and made them red)

Related Posts Plugin for WordPress, Blogger...